Battery Distribution System
Battery Distribution System | |
|
| This device is intended for emergency/portable use. A standalone battery or car battery provides the input power, with a range of outputs available, inluding: USB, USB-C, banana plug, automobile connector and Anderson Powerpole connectors (the latter is commonly used for portable radio operations). It also incorporates a meter for monitoring battery health and power usage. |
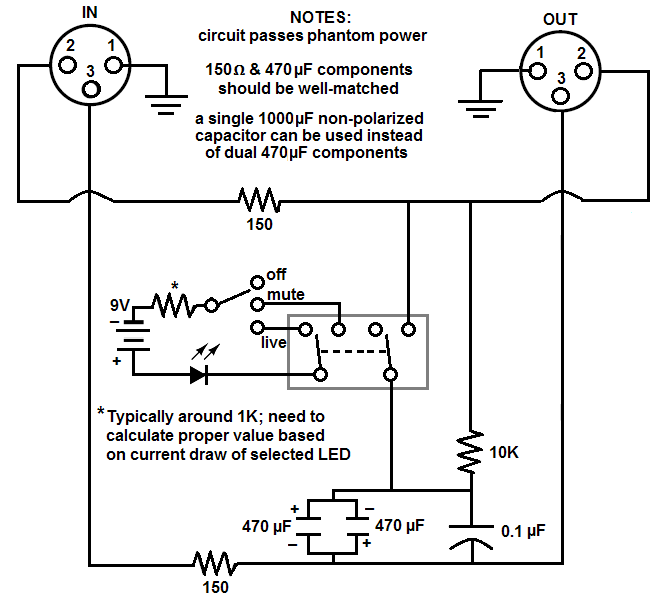
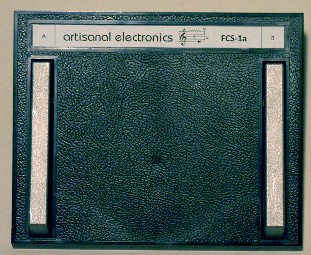
Battery-Operated Phantom Power Supply | ||
| "Phantom power" is required by a certain type (typically condenser) of microphone, and is usually supplied by a sound board. There are plug-in standalone phantom power supplies, but I've never seen a battery-operated one, which I frequently need when playing outdoors, so I built this one from a schematic I found online ages ago. (Actually, I'd built one years ago, and used it frequently, but it needed to be disassembled to get at the batteries; this one has a battery compartment that's accessible from the rear.) This unit uses two 9 volt batteries. |
|
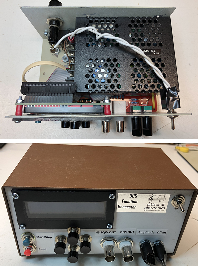
Function Generator | ||
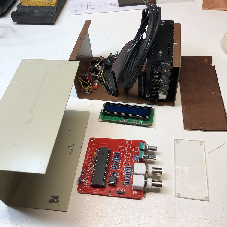
| A function generator is probably the third most important piece of electronic test equipment (after the multimeter and oscilloscope). It is used to create electronic signals with different characteristics (like wave- or square-shaped) to troubleshoot audio and radio equipment. I was able to obtain a board with all the parts on it cheaply, as well as the power supply it required. I also had a nice case for it. I had to desolder all the switches off the board (I replaced them with switches from my parts collection), and also had to separate the display and run a cable to it. I also spray-painted the case because it was kind of shabby. The case is steel, and I don't have a lot of metalworking tools, so it was a bit of a struggle to cut all the holes I needed (especially the square ones - and I broke two drill bits drilling some of the round ones!). Finally, I made a bezel for around the display (to hide my crudely-cut square opening) by putting electrical tape on a piece of clear plastic, spray-painting the thing black, then peeling the tape off to reveal the clear opening. I surprised myself a bit when the thing actually functioned perfectly the first time I powered it on! |
|
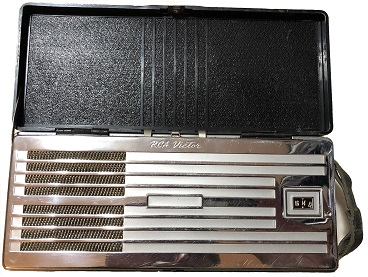
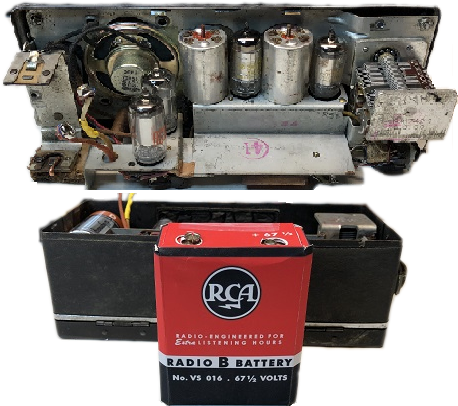
RCA Victor BP-10 portable AM radio | ||
|
Ever wonder why there are "A" (well, AA and AAA), "C" and "D" batteries, but no "B" batteries? Well, once upon a time, there were "B" batteries. The original "A" batteries (now called "D" batteries) and "B" batteries were used to power portable devices with tubes, with the "B" battery supplying the high voltages required by tubes. I restored an RCA Victor BP-10, the very first portable radio ever designed to be powered exlcusively by batteries. It was pocket-size (if large coat pockets count) and used miniature tubes designed specifically for this model, which was sold in 1940 and 1941. Part of the restoration was to build a "B" battery (using plans I found online) with seven 9-volt batteries inside it. |
|
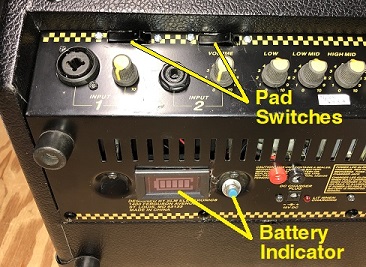
Crate TX15 amplifier modifications | |
|
I love my Crate TX15 battery-powered portable instrument amplifier, but it has some design shortcomings that I decided to remedy. The first is the fact that the thing is just too darn loud - I often need to use it with the volume set at somewhere between less than one and one-and-a-half. I therefore added "pad" switches to reduce the volume. I also ran into a problem a couple of times when I thought the battery was charged, but the thing died on me mid-gig (when fully charged, the batteries last many hours). I therefore added a battery charge indicator with a push-button switch so that I can check the charge level. |
|
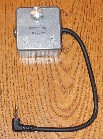
Ultrasonic transducer | |
|
| I originally built this as a kit from Midnight Science (no longer available). It takes ultrasound (sounds that are too high in pitch to be heard by the human ear) and translates it into sound you can hear - so that you can hear bats, insects, dog whistles, and stuff like that. It worked great, but I thought it would be more fun if I rebuilt it into a steampunk case. The original unit was built into a plastic case and required headphones; I built and installed an audio amplifier to power an internal speaker. I also mounted the microphone into a wooden wand (it was built into the plastic chassis of the original unit) and affixed a cradle for the wand. |
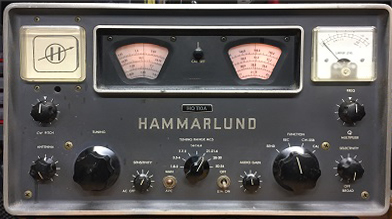
Hammarlund shortwave radio restoration | |
| I wasn't looking for a project like this, but I obtained this antique amateur radio receiver at a price I couldn't resist. It was not completely functional, and one of the knobs was broken, but I was able to find an exact replacement knob and to restore the radio to full functionality. |
|
XLR mute switch pedal with indicator | |
|
| I built this to mute a microphone that's connected to a sound system. It is a replacement for my original, which only worked when you stepped on it (momentary); this one can be toggled on or off at the press of the foot. This upgrade adds a live/mute indicator. Click on the photo for the schematic diagram. |
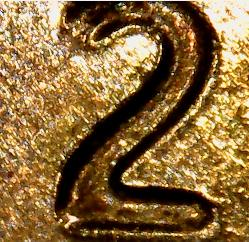
USB Microscope Mod | ||
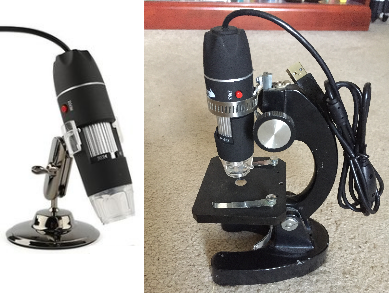
| I bought a USB microscope from BangGood.com (an amazing source of inexpensive gadgets from China) for under $10 that works unbelievably well (the image to the right is of the "2" in the date of a penny). I had an old broken microscope from my youth, and retrofitted the USB scope to the old base. Voíla! |
|
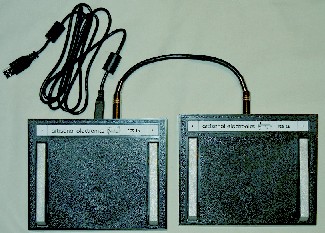
Programmable USB dual-pedal controller | ||
|
I use an Acer notepad for sheet music at performances & practices. I wanted the ability to scroll up & down hands-free, but an inexpensive version of this device is not available commercially. I therefore built a USB-interfaced pedal controller by installing a DIY-Keyboard (formerly available from pcsensor.com) into a two-pedal device (originally intended for medical imaging equipment). The pedals can be programmed (using PC software) to generate any keystroke or set of keystrokes when pressed. I also built a secondary pedal that can be plugged into the primary pedal (via ¼ inch stereo patch cord), yielding 4 possible keys that can be assigned to the foot controller set (My default settings are "PgUp" & "PgDn" on the left, and "Up" & "Dn" arrows on the right.) The setup can be used with any device that can accomodate a regular USB keyboard. |
|
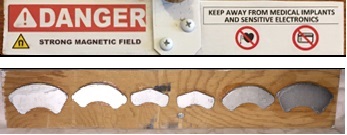
High Power Magnetic Broom | ||
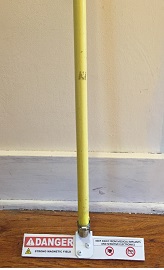
| A constant rain of micrometeorites falls to earth, but they're seldom detected. They can most readily be found by sweeping magnets across sandy beaches. I scavenged powerful rare earth magnets from dead hard drives to make this magnetic broom with that primary purpose in mind. |
|
Second generation iPhone adapter | ||
| I built this adapter to connect an external audio source to my iPhone, according to the schematic at right. Unfortunately it is mono only (the only way to record to the iPhone in stereo is via a more complex Lightning adapter). |
|
Webster-Chicago Model 288-1R wire recorder restoration | ||
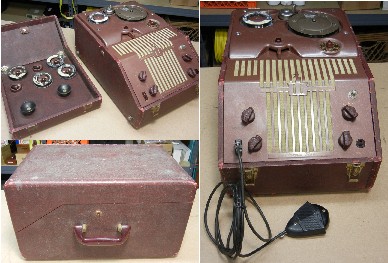
| Devices to magnetically record onto steel wire were briefly in use (in the 1940's and early 1950's) prior to the advent of reel-to-reel tape. This device was in sad shape when I purchased it, but is now fully functional (it required mechanical and electrical work, as well as restoration of the case). This recorder adds to my small collection of antique audio recording devices and accessories. Click on image at right for video of this wire recorder in action. | |
original iPhone microphone adapter | ||
| I built this adapter to connect the audio output from a scanner into my iPhone, according to the schematic at right, based on the instructions found at this website. One thing I can do with it is connect it to my radio scanner, and decode aircraft transmissions using Black Cat Systems' ACARS Decoder app. |
|
Coffee grinder adjustment | |
| The coarsest setting on our Delonghi coffee grinder was too fine, so (taking a cue from Zheng's blog) I hacked the inner mechanism so that we could achieve the perfect grind. Yes, I voided the warranty, but what's more important - a warranty I'll probably never need, or a good cup of coffee? |
Nixie tube tester | ||
| Nixie tubes are very cool retro-looking neon-type tubes used in some 1950's and 1960's electronics to display numbers. I salvaged two of these tubes from a multimeter I lost in a major flood at our house in September 2011. I decided to build this box to test the tubes, and to familiarize myself with how they work. The unit runs off a 9 volt battery using a power supply (from a kit I purchased online from LEDsales in Australia) to step the voltage up to 170 volts. The "chicken-head" knob completed the retro look. |
|
Message indicator extension | |
| My phone has a flashing light to indicate that I have a message, but it's somewhat hidden behind the handpiece, so I cut up a length of fiber optic cable into pieces, made it into a bundle, and inserted it into a copper fixture that I painted (well, actually Sharpied) black & affixed to the phone. Voila! Now I can see the flashing light from the doorway, without having to go to the phone to check it :) |
SD card to USB adapter |
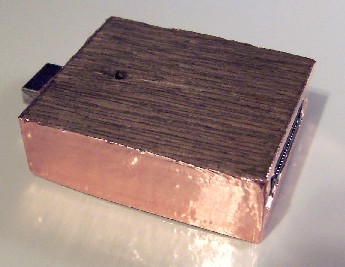  The adapter for my camera card was originally encased in a hideous hinged plastic thing; i decided to extract the innards and encase them in wood instead. Marie suggested the copper side trim to make it look more steam-punk, a fashion we've been intrigued with after seeing the movie Metropolis. |
 al's home page